
If you're looking for an easy way to manage your Docker containers, then you should check out Portainer. It's a lightweight and easy-to-use management interface for Docker that can be installed on your Synology NAS. In this blog post, we will show you how to install and use Portainer on your Synology NAS. We will also give you some tips for getting the most out of Portainer.
What is Portainer and what are its benefits
- Portainer is a lightweight and easy-to-use management interface for Docker that can be installed on your Synology NAS. It provides a graphical interface for managing your Docker containers. Some of the benefits of using Portainer include:
- Easy to use - Portainer is very easy to use. It has a simple and intuitive web-based interface.
- With Portainer, you can easily create and manage multiple Docker environments.
- You can also monitor your containers' health and performance, and even manage your Dockerfiles.
How to install it on your Synology NAS
To install Portainer, you'll first need to install Docker. You can find instructions for how to do that here.
Portainer may be installed in a variety of ways:
Portainer may be installed in a variety of ways:
- Task Scheduler
- SSH (Docker CLI)
- Docker compose
Task Scheduler
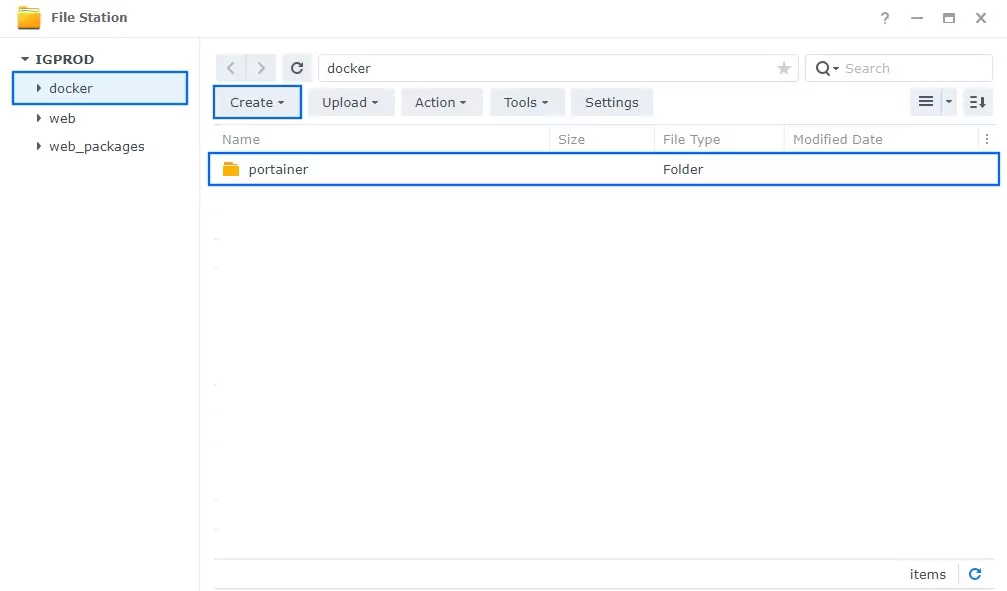
To get started, open the Docker folder located on nas fromFile Station and make a new subfolder called "portainer". Follow these steps below to continue:
In order for everything else in this guide work properly it's important that you do not skip any steps!
Go to Task Scheduler / Create / Scheduled Task / User-defined script in the Control Panel. Follow these steps below to continue:

When you click on User-defined script in the dropdown menu, a new window will pop up. Follow these steps to get started:
- General : Enter task name ex “Install Portainer” in the Task area. "Enabled" should be unchecked. Choose root User from the options.
- Schedule: Select Run on the following date then select “Do not repeat“.
- Task Settings: Check “Send run details by email“, add your email (Optional), then copy paste the code below in the Run command area. After that click Red button OK.
docker run -d --name=portainer \
-p 8000:8000 \
-p 9000:9000 \
-v /var/run/docker.sock:/var/run/docker.sock \
-v /volume1/docker/portainer:/data \
--restart=always \
portainer/portainer-ce
The table below lists all of the variables we used to implement Portainer.
| Parameter | Function |
|---|---|
| -v /var/run/docker.sock | sock is a Unix socket that enables the Docker server-side daemon, dockerd, to communicate with its command-line interface via a REST API |
| -v /volume1/docker/portainer:/data | Path to save data / configuration of portainer |
| -e UMASK_SET=022 | Always restart the container regardless of the exit status |
| --restart=always | EXTRA OPTIONAL: This changes the internal port of deemix. DON'T CHANGE THIS IF YOU DONT KNOW WHY YOU WOULD DO IT |
| portainer/portainer-ce | The name of the image from dockerhub |
| -p 8000:8000 -p 9000:9000 | Through 8000 port, the Edge Agent can poll the Portainer instance 9000 is for the GUI |
Go to http://YOURSERVERIP:9000 to view the web interface.
Trought SSH
Please see the post on how to access ssh if you want to use it instead of the graphical way.
- How to connect to your Synology via ssh
- After you've successfully gained access using ssh,
- Create the portainer folder in the location where you organize your containers, in my case:
mkdir /volume1/docker/portainer
test@NAS:/volume1/docker$ ls -ltr
total 0
drwxrwxrwx+ 1 test users 0 Feb 16 15:24 portainer
After you've created your folders and subfolders, execute the docker command:
sudo docker run -d --name=portainer \
-p 8000:8000 \
-p 9000:9000 \
-v /var/run/docker.sock:/var/run/docker.sock \
-v /volume1/docker/portainer:/data \
--restart=always \
portainer/portainer-ceTrought Docker compose
- Prerequisites?
Check to see if Docker Engine and Docker Compose have already been installed.
After that, create a new file named docker-compose.yml in the same directory as /volume1/docker/portainer and paste the code below into it.
version: '3.3'
services:
    portainer-ce:
        container_name: portainer
        ports:
            - '8000:8000'
            - '9000:9000'
        volumes:
            - '/var/run/docker.sock:/var/run/docker.sock'
            - '/volume1/docker/portainer:/data'
        restart: always
image: portainer/portainer-ce- run the following command using the docker compose command:
test@NAS:/volume1/docker/portainer$ sudo docker-compose up -d
Creating portainer ... doneConfiguration of Portainer
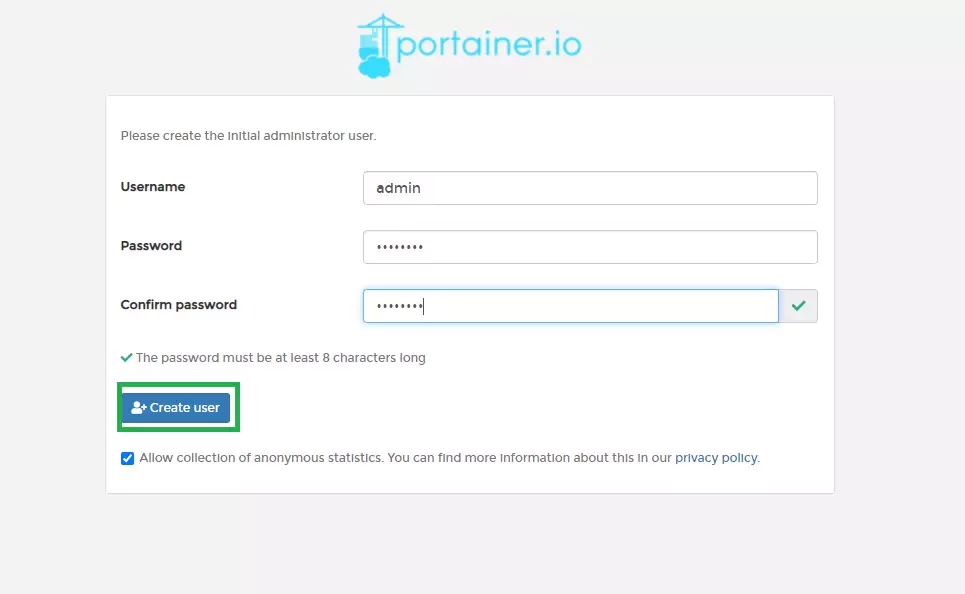
- Follow these steps below to continue: In order for everything else in this guide work properly it's important that you do not skip any steps!
- You need a username and password in order to log into your new account. Enter the desired name for this, then type a new password before continuing!

- Click the Get Started button (Proceed using your local environment) to continue.
The process is quite simple but it does take a few minutes for everything go smoothly so feel free to read through these steps or click on "Next" anytime you want! - Choose "Local." Docker is now installed and configured correctly!

How to use Portainer to manage your Docker containers
Once you have installed Portainer on your Synology NAS, you can use it to manage your Docker containers. To do this, you first need to create a new container. You can do this by clicking on the "Create New Container" button in the top left corner of the Portainer interface.
When creating a new container, you will need to provide a few pieces of information. The first is the name of the container. This can be anything you like, but it's a good idea to choose something that reflects what the container contains. The second is the image to use for the container. This can be any Docker image that is available on your Synology NAS or online.
The third piece of information is the command to run when the container is started. This is optional, but it can be useful if you want to run a specific command when the container starts up. For example, you could use this to start a web server in the container.
Once you have created a new container, you can start it by clicking on the "Start" button in the top right corner of the Portainer interface. You can also stop and restart containers using this button.
You can also view logs for containers by clicking on the "Logs" tab in the main window. This can be useful for troubleshooting problems with your containers.
Portainer also includes a number of useful features for managing your containers. For example, you can use the "Ports" tab to view and manage the ports that are used by your containers. You can also use the "Volumes" tab to view and manage volumes attached to your containers.
Tips for getting the most out of Portainer
Portainer is a powerful tool that can simplify your workflow and help you get the most out of your containers. Here are some tips for getting the most out of Portainer:
1. Make use of the built-in dashboard
The dashboard is a great way to get an overview of your containers and their status. It includes information such as the number of containers, their status, and the CPU and memory usage.
2. Use labels to organize your containers
Labels can be a great way to organize your containers. You can use them to differentiate between development and production environments, for example.
3. Use filters to quickly find specific containers
Filters can be a great way to quickly find specific containers. You can filter by name, image, label, and more.
4. Use the power of Docker Compose
Docker Compose can be a powerful tool for managing your containers. You can use it to create and run multi-container applications.
5. Use Portainer as a learning tool
Portainer can be a great way to learn about Docker and containers. It provides a simple way to get started with containers and helps you understand how they work.
6. Use Portainer to manage your applications
Portainer can help you manage your applications. You can use it to start, stop, and restart containers with a single click.
7. Monitor your containers with ease
With Portainer, you can easily monitor the performance of your containers. You can see information such as CPU and memory usage, network traffic, and more.
8. Use Portainer for troubleshooting
If you're having trouble with a container, Portainer can be a great tool for troubleshooting. You can see the logs for a specific container and get a better understanding of what's going on.
9. Export your data for further analysis
If you need to analyze your data further, you can export it from Portainer for further analysis. You can export data in JSON, XML, or CSV format.
10. Use Portainer to manage multiple Docker hosts
Portainer can be used to manage multiple Docker hosts. You can use it to manage containers on a single host or on multiple hosts.
With these tips in mind, you can get the most out of Portainer and make it work for you.
Conclusion
Finally, Portainer includes a powerful Dockerfile editor that allows you to create and edit Dockerfiles. This can be useful for creating custom images or adding new features to existing images.
By following these tips, you can get the most out of Portainer and use it to manage your Docker containers. Thanks for reading!
If you like this post, please consider donating so that we can continue to maintain our site.?

Leave a comment
Your email address will not be published. Required fields are marked *