
What is Uptime Kuma
Uptime Kuma is a selfhosted, open source, and free web server monitoring software. It helps to monitor the availability of all the websites hosted on your web server.
It provides an easy way to monitor the uptime of your sites and get instant notification in case of any downtime or performance issues.
It is designed for small to medium-sized businesses who do not have an IT staff but still need to maintain their own server.
Features:
- Easy installation
- Monitoring uptime
- Site failure notification
- Monitor performance
- Monitor disk space
- Monitor load
- Monitor CPU usage
- Monitor memory usage
- Graphs
- Customizable notifications
- Free and much more
Synology's "Package Center" can be used to install Docker.
Installing Uptime Kuma is a simple process, as it only requires a few steps to be completed:
- Task Scheduler
- SSH
- Docker compose
- Portainer
Task Scheduler
Open the Docker folder from File Station. Make a new folder called Uptime-kuma within the docker folder. Follow the steps outlined in the diagrams below.

Go to Task Scheduler / Create / Scheduled Task / User-defined script in the Control Panel. Follow the steps outlined in the diagrams below.

A new window will popup once you click on User-defined script. Follow the steps below to get started:
- General : Enter task name ex “Install Uptime-kuma” in the Task area. "Enabled" should be unchecked. Choose root User from the options.
- Schedule: Select Run on the following date then select “Do not repeat“.
- Task Settings: Check “Send run details by email“, add your email (Optional), then copy paste the code below in the Run command area. After that click Red button OK.
docker run -d --restart=always -p 3001:3001 -v /volume1/docker/uptime-kuma:/app/data --name uptime-kuma louislam/uptime-kuma:1Go to http://YOURSERVERIP:3001 to view the web interface.
Trought SSH
Please see the post on how to access ssh if you want to use it instead of the graphical way.
- How to connect to your Synology via ssh
- After you've successfully gained access using ssh,
- Create the Uptime-kuma folder in the location where you organize your containers, in my case:
mkdir -p /volume1/docker/uptime-kuma/After you've created your folder and subfolders, execute the docker command:
sudo docker run -d --restart=always -p 3001:3001 -v /volume1/docker/uptime-kuma:/app/data --name uptime-kuma louislam/uptime-kuma:1Trought Docker compose
- Prerequisites?
Check to see if Docker Engine and Docker Compose have already been installed.
After that, create a new file named docker-compose.yml in the same directory as /volume1/docker/uptime-kuma and paste the code below into it.
version: '3.3'
services:
    uptime-kuma:
        restart: always
        ports:
            - '3001:3001'
        volumes:
            - '/volume1/docker/uptime-kuma:/app/data'
        container_name: uptime-kuma
        image: 'louislam/uptime-kuma:1'
        hostname: uptime-kuma # Instead of numbers, the hostname will be Uptime-kuma. (optional)
network_mode: bridge # If you wish to use bridge mode, follow these simple step. (optional)- run the following command using the docker compose command:
test@NAS:/volume1/docker/uptime-kuma$ sudo docker-compose up -d
Creating uptime-kuma... done
This command will download and install all of the necessary dependencies for Uptime Kuma.
After the installation has finished, you can verify that it was successful by running:
sudo docker ps -aTrought Portainer
I prefer to use the Stack option to organize my Docker composes. This allows me to store, edit, and manage all of my Docker composes with Portainer.
- Note: If you've never heard of Portainer or are unfamiliar with it, this post how to install Portainer, will walk you through installing it and managing all of your Docker containers. with the use of a graphical dashboard
- After you installed Portainer, Go to your Portainer interface http://YOURSERVERIP:9000
- Enter the username and password for your credential.
- Click the Stacks option on the left side of your screen.
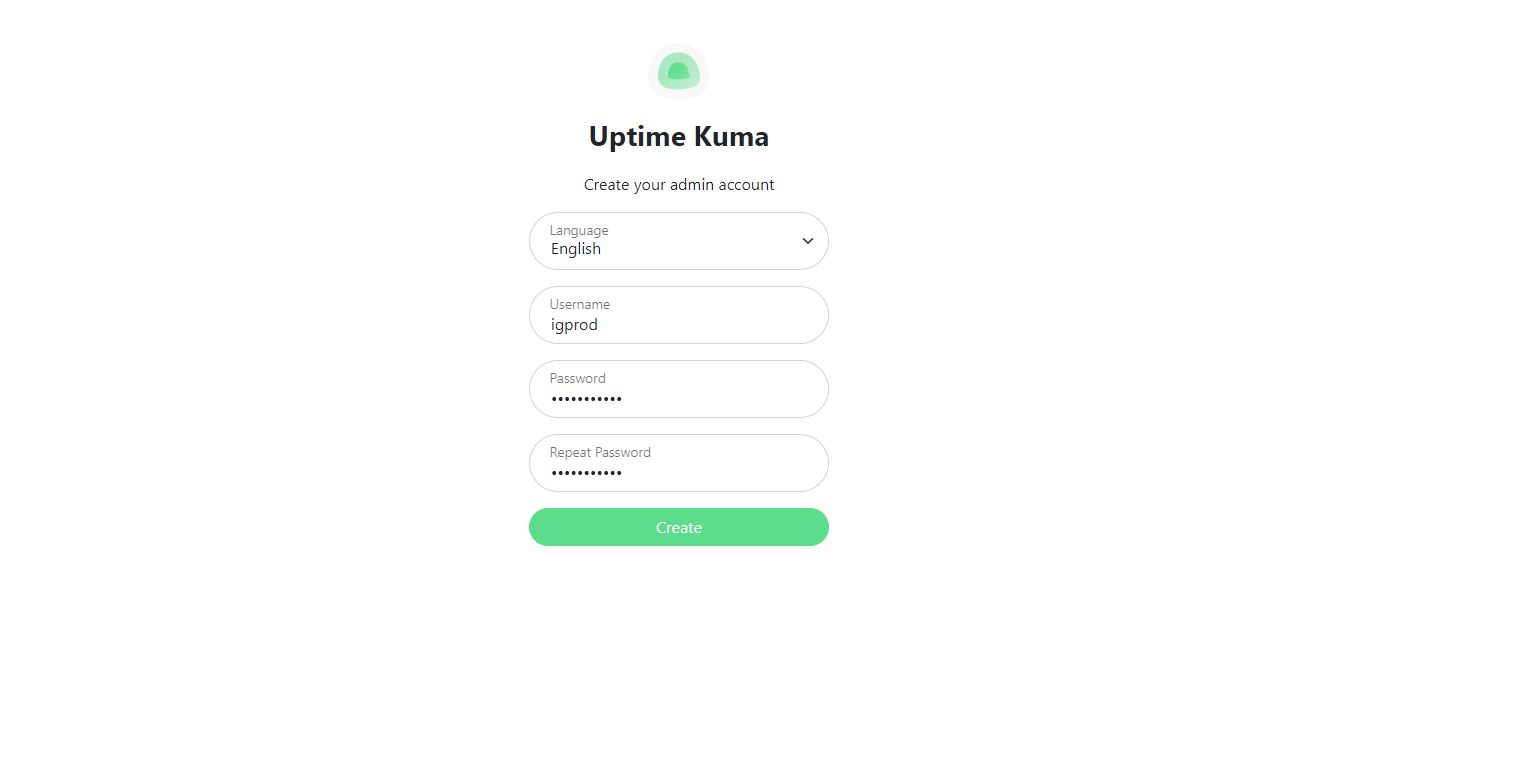
- Click the +Add stack button, then paste the docker compose we used for docker-compose.yml then clic hit Deploy the stack button, follow the steps outlined in the diagrams below.
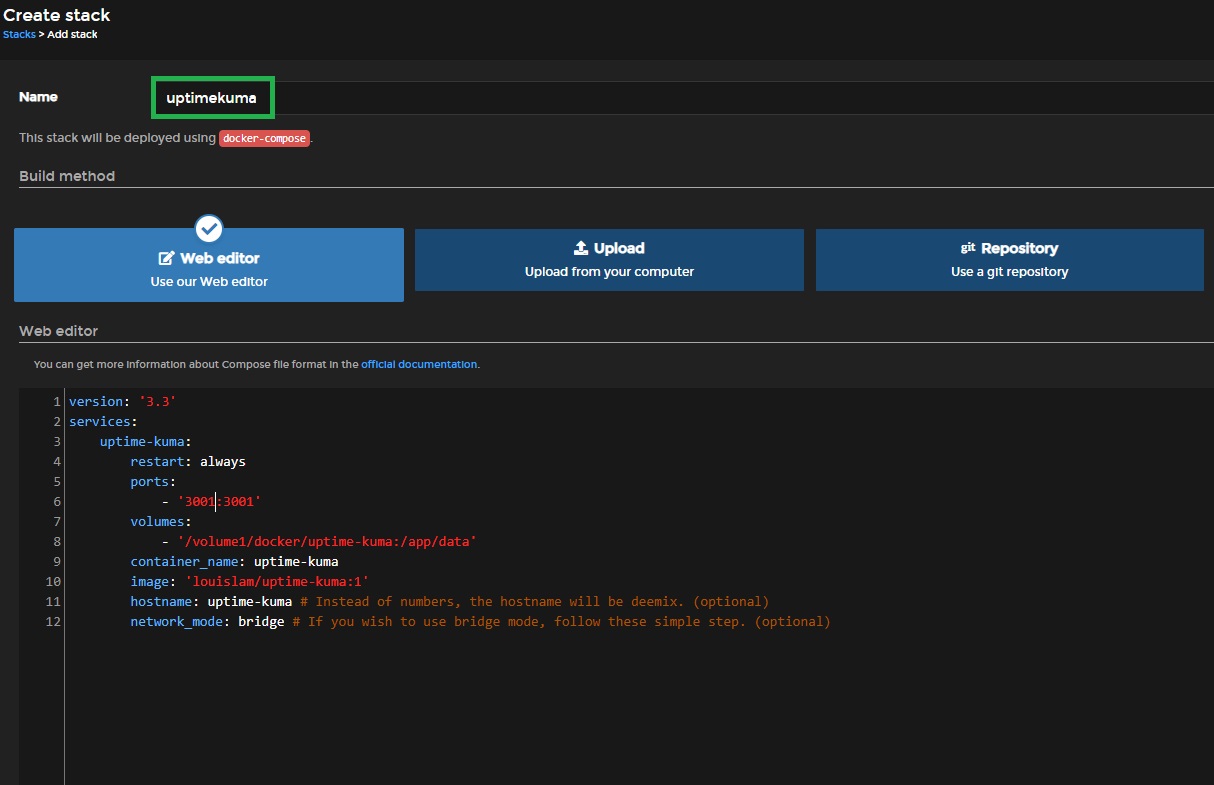
Note: The name of the stack must consist of lower case alphanumeric characters, '_' or '-' (e.g. 'my-name', or 'abc-123').
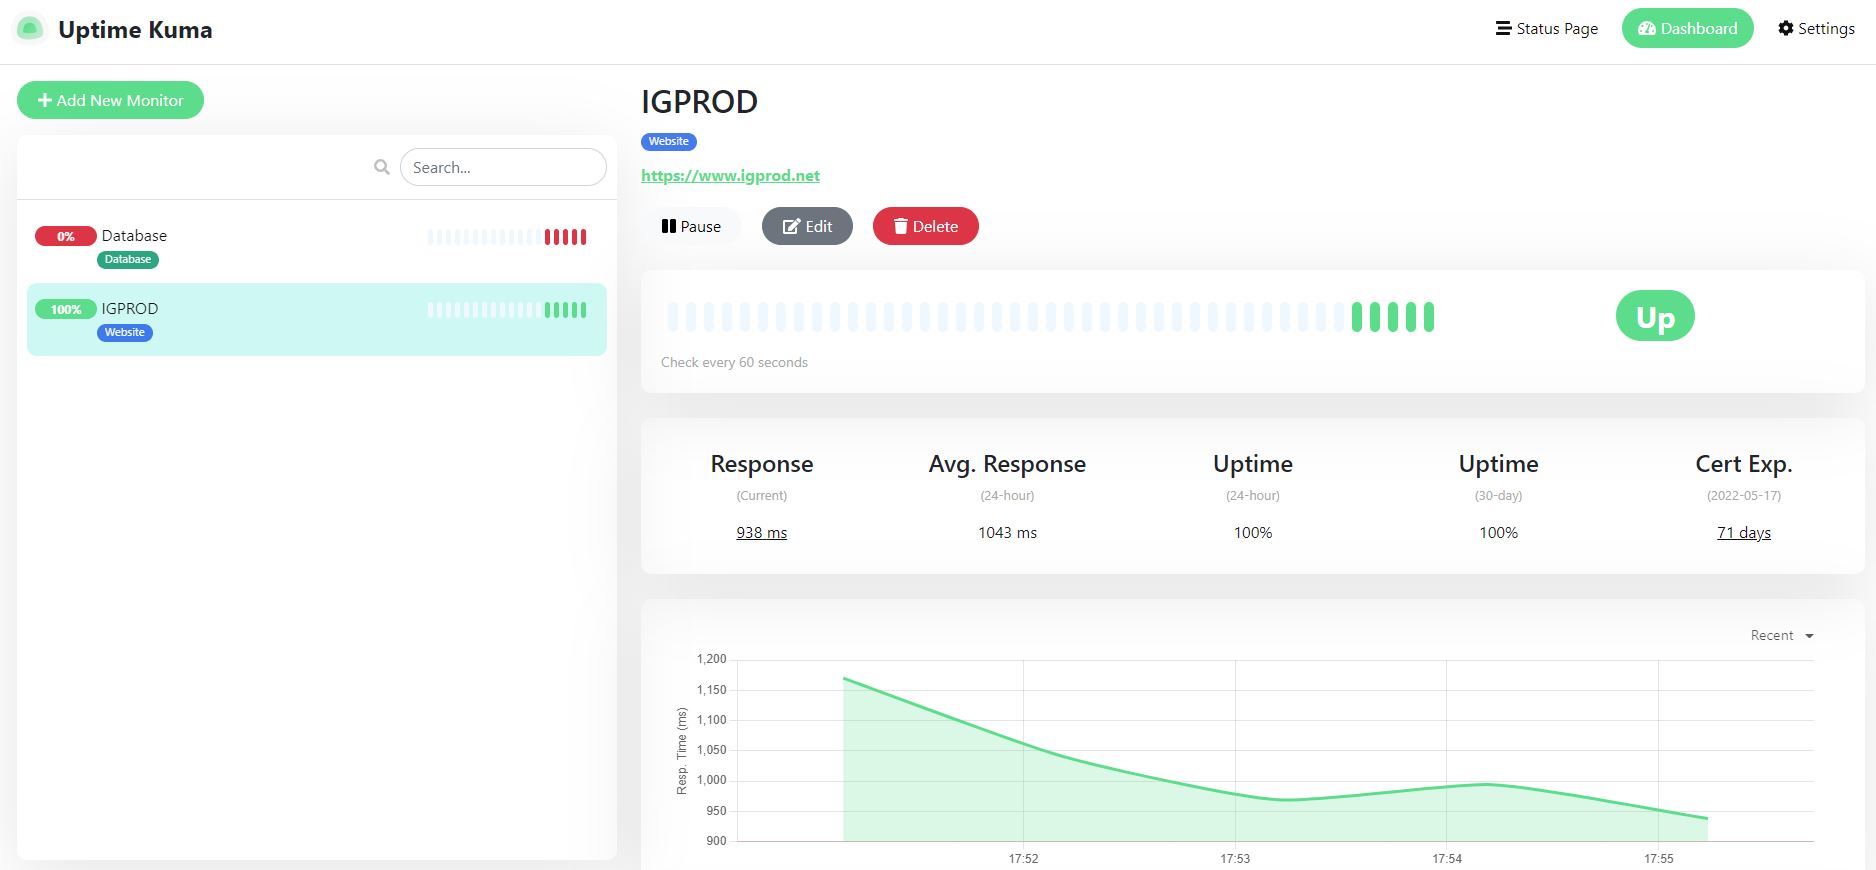
Screenshoot
Conclusion
In this article, we have discussed how to install the Uptime KUMA on a Synology NAS. We also looked at some of the benefits of installing it and what you can expect from it. The installation process is fairly easy and should not take more than 10 minutes.
If you like this post, please consider donating so that we can continue to maintain our site.?

Leave a comment
Your email address will not be published. Required fields are marked *